picture used: https://upload.wikimedia.org/wikipedia/en/8/8e/DisneyCheshireCat.jpg
 |
| The Cheshire Cat |
Step 1: Choosing the right pumpkin
For this design, you should pick a pumpkin that is wider and shorter with smooth skin. Beyond that, there isn't any specific pumpkin that you need.
Step 2: Getting supplies/preparing the pumpkin
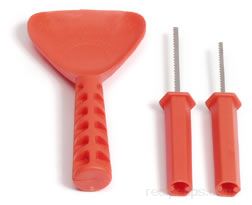 |
| pumpkin carving kit |
Prepare this pumpkin just like you would any other carving pumpkin; by gutting the pumpkin and scraping it clean. Use a scraper and ice cream scoop to do this, removing the large inner clumps first then scraping the sides of the inside of the pumpkin with a scraper. Wipe off the pumpkin to get any seeds and innards off and clear your slate.
picture used: http://files.recipetips.com/kitchen/images/refimages/seasonedinsight/carve_pumpkin/pumpkin_tools.jpg
Step 3: The Design

Once you have the stencil prepared, place it on the pumpkin and color in the stuff that was cut out with the black marker. You are now ready to carve.
Step 4: Carving
The easiest part to start carving is the tail. When you cut out the black marked chunks, be sure to cut them fully and smoothly, using a serrated knife or pumpkin carving knife to do so. Work your way down the tail, carving out each and every black chunk. Once the tail is done, start the face; I started with the ears and eyes since they are easier. When carving them, use smaller cuts and make sure to get all the way through the pumpkin, or they won't be seen. After that, carve the mouth, using even smaller, shorter cuts, one for each line. It is extremely crucial to make sure the cut goes all the way through and is clean, otherwise the mouth, which is arguably the most important part of the Cheshire Cat, will be invisible.Step 5: Finishing the tail*
*This step is more complicated and can be skipped if needed.
 |
| The finished tail |
You are now going to remove the skin on the grey colored patches in the tail, in between the black, cut-out patches. Using the same technique as before, carefully scrap off the skin using the smooth knife in those patches. It was easier for me to start on the edges of the carved parts; it provides a nice, easy starting point. When you are done, there should be an alternating pattern of lightly-colored and cut out patches forming the tail.
Step 6: Finishing the pumpkin
 |
| My pumpkin |
At this point, you should test the pumpkin to make sure the carving is complete. To do so, turn off the lights and shine a flashlight from the middle. If you have done the carving correctly, all of the cuts should appear clean and, if you scrapped the skin off the tail, the tail should be lighter colored then the rest of the pumpkin. If any part of the carving appears dirty or ragged, use the non-serrated knife to smooth out the insides of the cut.
Once you are satisfied, remove the flashlight and place the candle inside, like you would with a normal jack-o-lantern. Turn off the lights, and admire your Cheshire Cat pumpkin!
No comments:
Post a Comment